


How to Build a Roof Over a Deck?
Adding a roof over your deck transforms an ordinary outdoor space into a versatile, weather-protected area perfect for entertaining, relaxing, or dining. However, constructing a deck roof requires careful planning, adherence to building codes, and attention to structural details.

Table of Contents
1. Choosing the Right Roof Style
Select a design that works with both structural constraints and client preferences:
Gable Roof: Ideal for areas with significant rainfall or snow. Provides good drainage and a classic profile.
Shed Roof: Simpler to build, slopes in one direction, modern appearance.
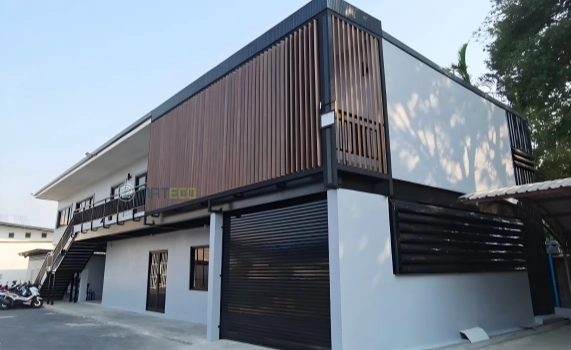
Pergola or Louvered Shade: Offers partial protection and light filtration. Works well in milder climates or decorative applications.
TIP: MATECO co-extrusion sun shading louvers offer a lightweight and low-maintenance alternative to traditional pergola systems. Their UV Armor technology ensures long-term durability without color fading.
2. Material Selection
For a long-lasting, low-maintenance build, use high-performance materials:
Structural Lumber: Pressure-treated or engineered wood for posts, beams, and rafters.
Roofing Options:
Asphalt shingles (residential match)
Corrugated metal (lightweight and fast to install)
Polycarbonate panels (translucent, lightweight)
Fasteners & Hardware: Galvanized joist hangers, hurricane ties, post anchors, expansion bolts.
Deck Finishes: Consider upgrading the deck with WPC decking for water resistance and minimal upkeep.

3. Step-by-Step Construction
Step 1: Install Support Posts
Use 6x6 posts set in concrete footings or anchored with heavy-duty brackets. Space posts based on span requirements and roof load calculations.
Step 2: Mount the Header Beam
Secure a ledger board to the house wall with lag bolts and proper flashing. For freestanding roofs, double up the front header for strength.
Step 3: Frame the Roof
Install rafters with proper pitch (minimum 1:12 recommended for slope). Use ridge boards and collar ties for gable roofs; simple joists for shed roofs.
Step 4: Add Sheathing & Covering
Lay plywood or OSB sheathing. Install underlayment and roof covering—shingles, metal, or other preferred material.
Step 5: Waterproofing & Drainage
Flash all transitions thoroughly (roof-to-wall, ledger, post penetrations). Add gutters and downspouts to control water runoff. Apply exterior-grade sealants on exposed wood.
4. Finish & Enhance
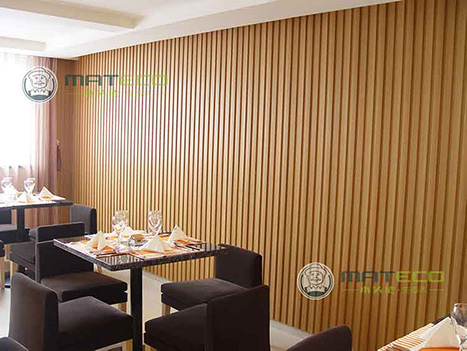
Soffits & Ceilings: Use MATECO WPC ceiling click panels or lightweight cladding for a clean, low-maintenance finish.
Lighting & Comfort: Pre-wire for lighting, fans, or heaters during framing.
Screening: Add privacy panels or install vertical timber tubes to define edges without enclosing the space.
Final Notes for Builders
A properly built deck roof not only improves comfort but also helps sell a home or commercial space by extending usable square footage. With lightweight and easy-to-install materials, installers can reduce labor time and eliminate long-term maintenance issues.
If you are looking for a WPC manufacturer, MATECO WPC will be your best choice.
WhatsApp: +86-13380085620
Email: info@matecowpc.com